Our Line of Rulers includes in top woodworking tools Designed with the Unique Set of Challenges that the Woodworker May Encounter at Top of Mind
It all starts with the innovative four-sided diamond ruler that allows you to measure from left to right or right to left on either the top or bottom side of the ruler.
MaKRS Rule is specifically designed to allow woodworks to easily and accurately measure in situations that typical rulers fall short.
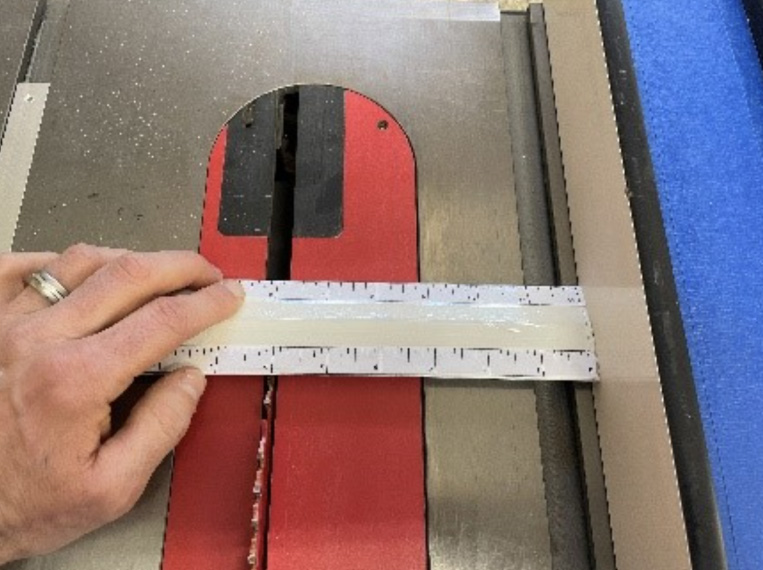
Table Saw (Fence to Blade)
Accurate measuring from fence to blade on the front and back of the saw blade (without having to read upside down).
- To measure the front of the blade, place side A up and read the distance from the fence to the blade.
- To measure the back of the blade (to ensure the fence is parallel to the blade) flip the device over along the long axis so that side B is up and read the distance from the fence to the back of the blade.
Table Saw (Blade to Miter Stop Block)
Accurate measurement of miter stop block from blade edge, from both the front and back of the blade.
- To measure from the stop block to the front of the blade, pace side B up and measure from the stop block to the blade.
- To measure from the stop block to the back of the blade, place side A up and measure from the stop block to the back of the blade.
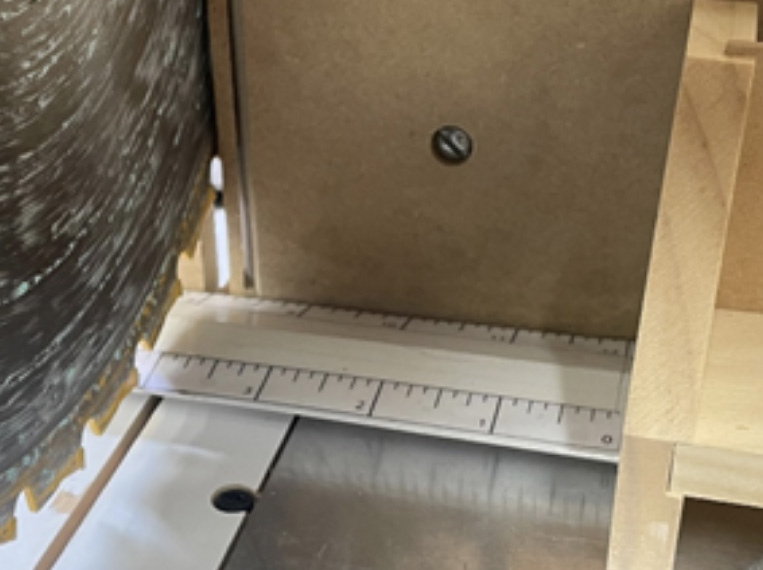
Router Table Depth of Cut
Measuring the depth of cut of a router bit is often challenging and frustrating. Because of the large profile of this device and the various orientations of the scales, one can use this device in combination with a square to precisely set the depth of cut on a router table.
- Place the zero-start side of the measuring device directly against the fence with the bottom side scale reading 12” to 0”.
- Using a small square, place the square against the measuring device and the edge of the router bit when the cutting surface is at its furthest point from the saw blade.
- With the square touching the blade, the intersection of the corner of the square and the measuring device will indicate the depth of cut from the fence to the router bit.
Miter Saw Stop Block Setup
A stop block can be set up on either side of the blade by changing the orientation of the measuring device.
- For a stop block on the right side of the blade - Set the measuring device against the fence with the bottom edge reading (from right to left) 0” to 12”.
- Place the end of the measuring device directly against the stop block and measure to the left edge of the blade.
- For a stop block on the right side of the blade, simply flip the measuring device over and repeat the process on the right side of the blade, measuring to the right edge of the blade.
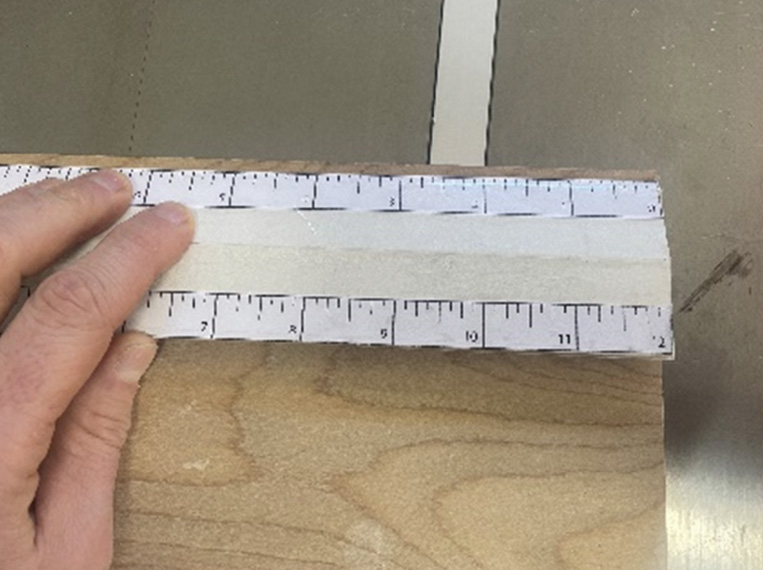
Measuring from Right to Left Side of Workpiece
Most rulers only read from right to left, creating challenges when measuring from the right side of a board. This device can easily measure from either side of a board without having to awkwardly manipulate the workpiece or measuring device.
- When measuring the top of a piece of wood from the right side in – place the device with side A up and use the top scale to measure flush from the edge of the board (0”) out to the desired length toward the inside of the board.
- Place the end of the measuring device directly against the stop block and measure to the left edge of the blade.
- When measuring the top of a piece of wood from the left side in – place side B up and again use the top scale to measure flush from the left edge of the board (0”) to the desired distance right toward the inside of the board.
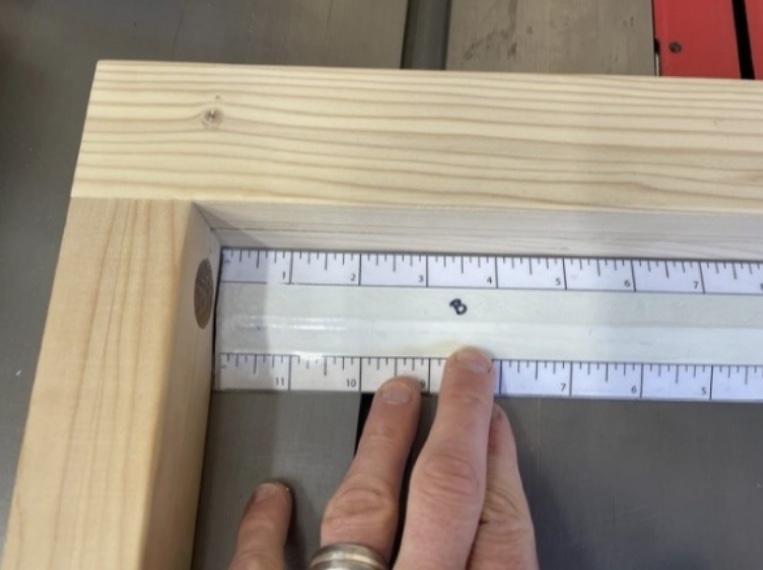
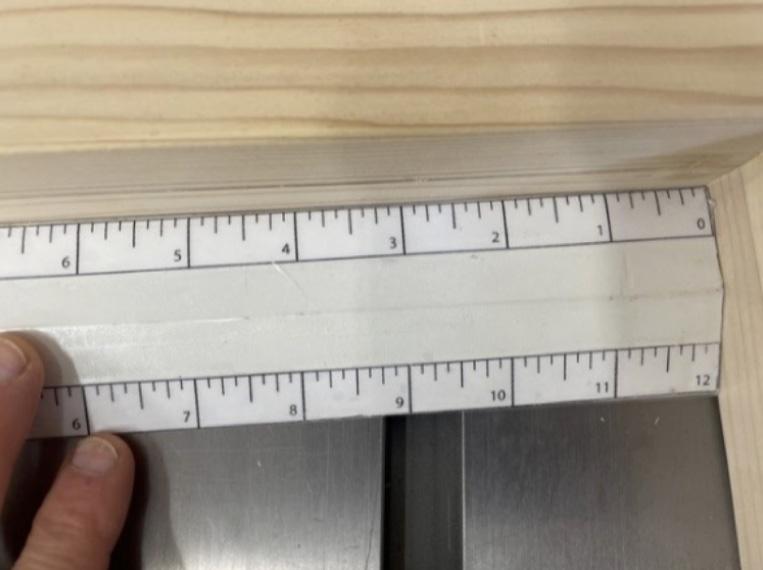
Measuring Inside a Confined Area (Like a Cabinet)
Measuring within a confined space is a great demonstration of many of this device’s characteristics. Consider the situation below marking 2 inches from the right and left, top and bottom of a confined space.
- Using as standard ruler this is very difficult.
- The ruler slides under the rounded edges of the furniture making accurate measurement very challenging.
- Only one of the three corners can be measured and marked without reading upside down, extending the mark or both. This creates frustration and error.
- Using this measuring device, the process becomes far easier and more accurate.
- Due to the zero start, thickness and four different graduations, marking within a confined space with this design is not only easy but extremely accurate.
- The user never has to read upside down, the device will not slide under the rounded edge of the workpiece, the markings can easily be made along the inside edge without having to extend a line.
Center Finding
There are many situations when one would need to find the center of a piece of wood. If the measuring device is longer than the width of the board, the process is simple.
- Because the device has graduations that start from either end, the center of the device can be found by locating where the same number is directly across from itself. In the case of a 12” long measuring device, this would be at 6”. The 6” mark on the top, will be directly across from the 6” mark on the bottom. Similarly, there will always be corresponding number across from one another. Continuing with the 12“long example, 2” will always be across from 10”.
- To find the center of any board narrower than the device, use either side of the device and identify the center of the device.
- Align the device at an angle to the board so that the number on the top left is aligned with the edge of the board (in this case 2”).
- Identify the number on the top right of the device that is directly across from the number aligned to the left edge. In this example we aligned the 2” to the left edge. On a 12-inch device the 10 will be across from the 2.
- Adjust the angle of the device across the board until the number 10 on the top right of the device is aligned with the right side of the board.
- Check to make sure both the 2 and the 10 on the top side of the device are aligned with the edges of the board, then mark the board at the 6” mark. This will be the perfect center of the board.
- A line may be drawn down the center of the board by completing these steps in multiple location along the length of the board and connecting the points with a line using the edge of the device.